Setting Up a NFTMart Node and Connecting to the Polkadot JS
Introduction
This guide outlines the steps needed to create a development node for testing the Ethereum compatibility features of NFTMart.
A NFTMart development node is your own personal development environment for building and testing applications on NFTMart. For Ethereum developers, it is comparable to Ganache. It enables you to get started quickly and easily without the overhead of a relay chain.
Getting Started
First, start by cloning the NFTMart repo that you can find here:
git clone https://github.com/nftt-studio/nftmart-node
cd nftmart-node
Next, install Substrate and all its prerequisites (including Rust) by executing:
curl https://getsubstrate.io -sSf | bash -s -- --fast
Once you have followed all of the procedures above, it's time to build the development node by running:
cargo build --release -p node-cli
Then, you will want to run the node using the following command:
./target/release/nftmart-node --tmp --chain=dev-evm --alice --rpc-port=8545 --rpc-cors=all -levm=trace
Connecting Polkadot JS Apps to a Local NFTMart Node
The development node is a Substrate-based node, so you can interact with it using standard Substrate tools. The two provided RPC endpoints are:
- HTTP:
http://127.0.0.1:8545 - WS:
ws://127.0.0.1:9944
Start by connecting to it with Polkadot JS Apps. Open a browser to: https://polkadot.js.org/apps/#/explorer. This will open Polkadot JS Apps, which automatically connects to Polkadot MainNet.

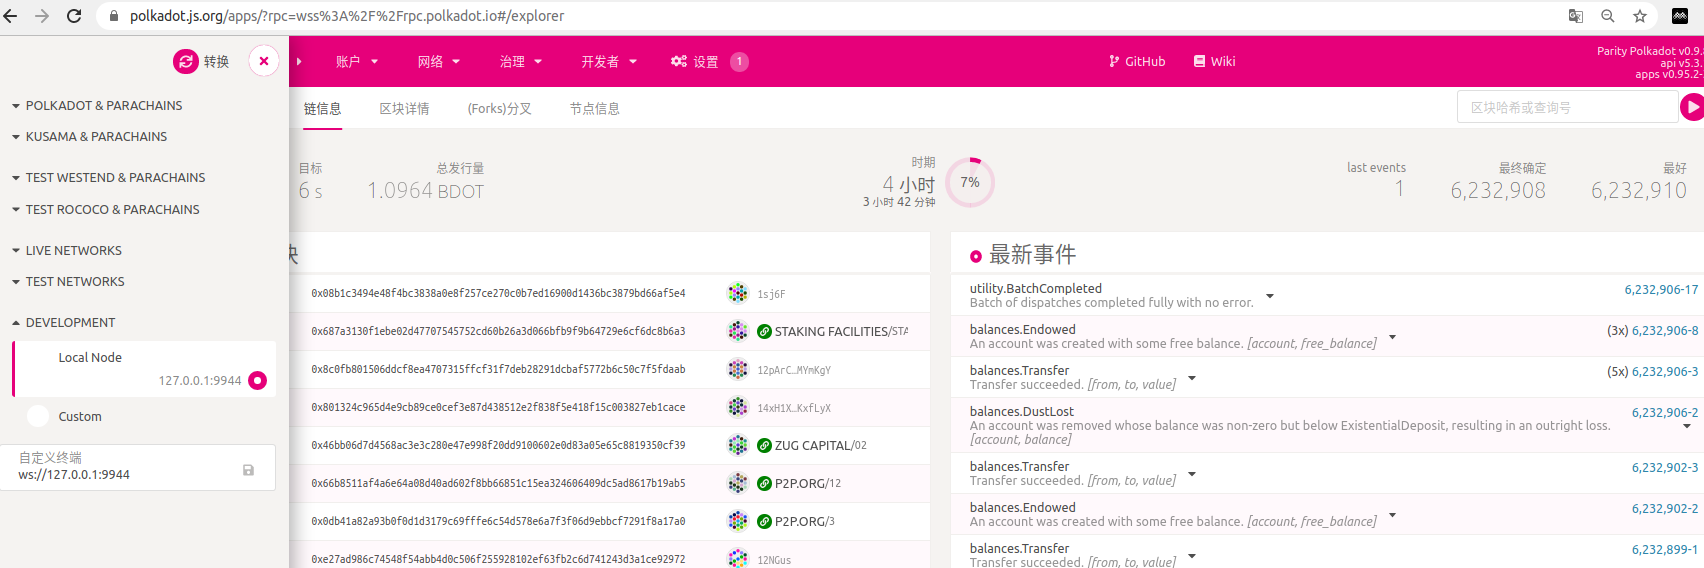
Click on the top left corner to open the menu to configure the networks, and
then navigate down to open the Development sub-menu. In there, you will want to
toggle the "Local Node" option, which points Polkadot JS Apps to
ws://127.0.0.1:9944. Next, select the Switch button, and the site should
connect to your NFTMart development node.

With Polkadot JS Apps connected, you will see some information similar to the following:
